


Archive for the ‘iDevBlogADay’ Category
Universal OpenGL Apps
Sunday, November 28th, 2010
I recently took part in the 360iDev Game Jam remotely from home. The game jam is always a lot of fun, even if you can’t get yourself to the 360iDev conference itself (which you should totally do, by the way, if you can. It’s an amazing conference). I created a game in 8 hours which I’m calling “Dirty Diapers”, you can see the details of its creation on the Game Jam site. There’s a video of the game in action at the end of that page.
The game is about keeping a room full of babies happy. Over time, babies become unhappy because they either want to be fed, changed, or rocked. It’s your job to drag an action up from the bottom of the screen to make the baby happy again. As time goes on, they get more unhappy more frequently.
I think it turned out quite well, so I’ve decided to try to get it into the store at some point. Right now I’m extremely busy with some contract work, but I’m trying to find a few hours here and there to finish it up and submit it.
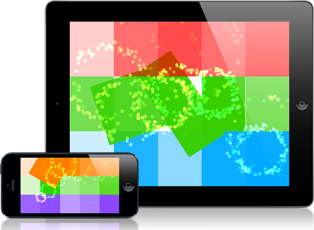
One of things I decided to try with this game was to build it as a universal app (that is, one app that runs on iPhone/iPod touch, and iPad, instead of separate apps for iPhone and iPad). The game is 100% OpenGL on the rendering side, so I needed to figure out how to set up my frame buffers for a universal app. I thought I’d go through that today. (Holy moly, a technical post instead of an indie lifestyle post! Hold on to your hats!)
Project Setup
The first thing you need to do for a universal app is set up your Xcode project so that it knows to build the app as universal. I went to Jeff LaMarche’s excellent blog and followed his instructions to do this part (and read the follow-up post for a few more details).
Once you’ve done that, you should have a project that can at least compile for iPad or iPhone. Good.
Frame Buffer Setup
Now that you’ve got your app building for multiple devices, you’re going to need to do some work to support multiple screen resolutions. As of this writing, there are three different resolutions to worry about:
- iPad: 1024 x 768
- iPhone/iPod touch (non-retina display): 320 x 480
- iPhone/iPod touch (retina display): 640 x 960
However, Apple does some clever stuff to help you with the retina displays. If you query the size of the screen:
CGRect screenFrame = [[UIScreen mainScreen] applicationFrame]; |
You’ll get 320 x 480 on both retina and non-retina displays. This is because they measure the screen in “points” instead of pixels now. On a retina display, there are 2 pixels for every point. The nice thing is that it lets you treat all iPhone/iPod touch screens the same way, with the same positioning code.
Ok, so we’ve got these different screen sizes, we need to tell OpenGL to create different sized frame buffers. Somewhere in your code you’ve probably got something like this, which creates a render buffer from an EAGLDrawable CAEAGLLayer:
glBindRenderbufferOES(GL_RENDERBUFFER_OES, buffer.m_colorBufferHandle); [oglContext renderbufferStorage:GL_RENDERBUFFER_OES fromDrawable:drawable]; glGetRenderbufferParameterivOES(GL_RENDERBUFFER_OES, GL_RENDERBUFFER_WIDTH_OES, &buffer.m_width); glGetRenderbufferParameterivOES(GL_RENDERBUFFER_OES, GL_RENDERBUFFER_HEIGHT_OES, &buffer.m_height); |
If you build and run, what you’ll find is that your render buffer will be created with the proper size for iPad and non-retina displays, but you’ll end up with a 320 x 480 render buffer for retina displays (which need 640 x 960), and your retina display game will look awful. This is because the CAEAGLLayer is telling OpenGL that it’s dimensions are 320 x 480 on the retina display.
In order to remedy this, we need to make use of two new UIView properties found in iOS 4.0 and up called: scale and contentScaleFactor.
scale
The new scale property will tell you the amount the point values of the UIView are being scaled. If you’re running on a non-retina display and query a view’s scale, it will be 1.0. If you’re running on an retina display, you’ll find that it’s 2.0. This gives you a way to test which kind of display we’re working with, and we’ll use this later.
contentScaleFactor
The contentScaleFactor is a different beast. This will always be 1.0. However, if you’re running OpenGL in a view on a retina display, you need to set this value to match the scale value of the view. This will tell the CAEAGLLayer to update its dimensions to match the actual pixel size of the screen, allowing you to create an appropriately sized render buffer.
Now, if you’re planning to support iOS versions prior to 4.0, these properties won’t be available, so you need to do runtime checks for them.
This is what I do inside my EAGLView’s -layoutSubviews method to set the contentScaleFactor on the view:
// Set the scale factor to be the same as the main screen if ([self respondsToSelector: NSSelectorFromString(@"contentScaleFactor")]) { [self setContentScaleFactor:[[UIScreen mainScreen] scale]]; } |
Now, when I tell the render buffer to create itself based on the size of the layer, it will create a 640 x 960 render buffer on a retina display, but a 320 x 480 buffer on a non-retina display. Hooray! But, we’re not quite there yet…
Viewport Setup
We’ve got our render buffer set up to create itself at the proper resolution now. It will match the screen dimension and contentScaleFactor of the EAGLView, which is what we want. Now we need to tell OpenGL to create an appropriately sized viewport. This code is for a 2D game, so adjust as necessary for a 3D game.
You’ll need to create a viewport that matches the frame buffer size for the given screen. Something like this:
glViewport(0, 0, buffer.m_width, buffer.m_height); |
For a 2D game, you then need to set up an orthogonal projection. There’s a good chance that you have a line in your code somewhere that looks like this:
glOrthof(0.0f, 480.f, 320.f, 0.0f, -1.0f, 1.0f); |
Clearly this isn’t going to work. Now, there are two options here for creating the transform:
1) Create the transform based on the UIScreen size
The code for this is simple:
CGRect appFrame = [[UIScreen mainScreen] applicationFrame]; glOrthof(0.0f, appFrame.size.width, appFrame.size.height, 0.0f, -1.0f, 1.0f); |
However, let’s look at what this does. On iPad, it creates a 1024 x 768 sized viewport. Great, that’s what we want. On a non-retina display, it creates a 320 x 480 viewport. Also good. But, on a retina display, it also creates a 320 x 480 display. Now, this is OK. The framebuffer is 640 x 960, so the pixels are there. So what does this mean?
The Good
You only need to write two code paths for positioning sprites on the screen: one for iPad, and one for iPhone, and let OpenGL handle matching the render buffer to the viewport appropriately for you. The only caveat here is that you’ll need to manually scale all your sprites’ sizes by 50%. If you do this, you’ll scale them down to the correct point size, and then OpenGL will render them at 100% resolution when it pushes the textures through the render pipeline.
Confused? Think about it this way: you’ve got a view port of 320 x 480 but a render buffer of 640 x 960. Take a sprite that’s 100 pixels x 100 pixels and render it as a 100 x 100 point sprite in the viewport. This is actually 200 x 200 pixels in the render buffer. So in order to render it as 100 x 100 pixels, you need to scale your vertices down by 50% to a 50 x 50 point sprite.
The Bad
You’ll need to write some code into your sprite system (and bitmap font system) to scale things to 50% if you’re on a retina display.
This is the approach I use. At app startup, I get the screen scaling factor, and then use it to scale all my sprites:
if ([[UIScreen mainScreen] respondsToSelector: NSSelectorFromString(@"scale")]) { ScreenScaleFactor = [[UIScreen mainScreen] scale]; InverseScaleFactor = 1.f / ScreenScaleFactor; } |
2) Create the transform based on the layer size
The alternative is to create a different viewport size based on the actual pixel size of the screen. You can do this by getting the size of your created render buffer. Something like this:
glOrthof(0.0f, frameBuffer.m_width, frameBuffer.m_height, 0.0f, -1.0f, 1.0f); |
This will give you a viewport that matches the screen size in pixels, not points.
The Good
The advantage here is that you don’t need to do any sprite scaling. You just render everything at 100%.
The Bad
You’ll need to have three different code paths for sprite positioning, based on the size of the screen, as you’ll now have three different sized viewports to worry about.
Art Work
You’ll probably want to have different sized artwork for non-retina displays than for iPad and retina displays. For Dirty Diapers I’ve got two game texture atlases: one for iPad and retina displays, and one for non-retina displays. The non-retina atlas is identical to the larger one, it’s just scaled down 50% in Photoshop. You could scale your graphics in OpenGL, but it will never look as good. If you’re like me, the imperfections will just drive you nuts.
So I have two texture atlases, but there are 3 possible screen sizes to worry about (see the next section). I do a check like this to determine which texture atlas to load:
if (UI_USER_INTERFACE_IDIOM() == UIUserInterfaceIdiomPad || ScreenSizeConsts::ScreenScaleFactor > 1.01f) { // Load texture atlas for iPad/Retina display } else { // Load texture atlas for Original iPhone display } |
If you want to load 3 different textures (iPad, non-retina, retina), you can use the @2x.png file naming convention (depending on how you’re loading your textures) and just check for iPad or not, but now you’re dealing with 3 sets of textures. The choice is yours. If you’re loading textures manually and the @2x trick doesn’t work, you can split things out like this:
if (UI_USER_INTERFACE_IDIOM() == UIUserInterfaceIdiomPad) { // Load texture atlas for iPad display } else if (ScreenSizeConsts::ScreenScaleFactor > 1.01f) { // Load texture atlas for Retina display } else { // Load texture atlas for Original iPhone display } |
Finally, Positioning
Now you’ve got your different artwork loading, you’ve got your render buffer set up, and your viewport set up. Now you just need to tell your objects to render in different positions, based on the screen. To do this, I set up a bunch of member variables for positioning code (for static items), and then on init, check the device and screen scale factors and adjust them accordingly. This is necessary for 2D art layout, but if you’re working with a viewport into a 3D world, you may not need to do nearly as much work here.
That’s it…
There you go. I hope you were able to follow along and I wasn’t too confusing. If you’ve got better ways of doing any of this, feel free to post suggestions in the comments.
Owen
The Distracted Programmer
Sunday, November 21st, 2010
On Friday I jokingly posted on twitter that I was going to write my #iDevBlogADay post on “How to code with a baby in your arms”. A whole bunch of people responded saying they’d love to see a post on “The Distracted Programmer”, so here I sit typing.
With a baby born over five weeks ago, I took several weeks off work entirely. But about two weeks ago I started trying to get back into doing little bits of work. Working from home with a baby in the house is proving to be quite difficult, but I’ve already learned a few things that are helping me get at least some work done. Just keep in mind, I’m still new to this. I don’t pretend to have all the answers, just some tips that work for me.
1) Start Small
When I first decided to start coding again, I set a goal of writing one hour of code per day. The first few days I failed miserably. I’m glad I hadn’t decided to work full days or I might have been very discouraged. However, after a few days I found I was able to get even up to two hours of work done, just in 20 minute increments. My main point here is don’t expect too much from yourself at first. Getting used to having a baby is a huge change, trying to work at the same time is a massive challenge. Accept that it’s going to be hard and don’t beat yourself up if you’re not working full days right away.
2) Learn to Work in Small Increments
If you haven’t read this excellent article called “The Interruptable Programmer“, do so now. All of his tips apply to working at home with a baby in the house. I’ll wait. Done? Good. The biggest take-away there is that you need to get used to working in small chunks. Always be aware of what you’re working on. Make notes about what needs to happen next. If you need to stop coding because the baby starts screaming, jot down something quick about what you were doing; put it right in the code if you have to. Personally, I bought a little Mac app called ShoveBox that allows you to take very quick notes just by pressing a key combination on your keyboard.
If you’re a programmer who likes to really dig deep into code and do marathon coding sessions (like I used to), this is going to be a huge adjustment, but it’s a necessary one. If the choice is between coding 30 minutes at a time and not coding at all, I’m going to try to code 30 minutes at a time.
3) Staying Motivated
One of the most difficult things for me over the last couple of weeks has been staying motivated when I can only code in short bursts. It’s easy to get side tracked. It’s really easy to get distracted with reading blogs posts [cough] after each break in coding. This will kill your time. You need to find ways to keep motivated and keep working. I’ve completely stopped reading RSS feeds during the last two weeks. It means I’m not as aware of what’s going on in the world of gaming, but I’ve got a contract to deliver on, so that takes priority. I try to limit my time on twitter when I’m starting a work chunk. I limit what links I click on to avoid being distracted.
The goal is to get right back in where you left off after you’ve been away from the computer for a chunk of time. This will help you stay motivated. Avoid the distractions, and you’ll find a new flow.
4) Talk to Your Partner
This is the most important point. Seriously. Make sure you do this.
If you’re a single parent, you’re amazing. I honestly don’t know how people do it on their own. A baby is a huge amount of work, even spread over two people. Single parents, I’m in awe of you.
But, if you’ve got a partner who is also at home (on maternity or paternity leave, or as a stay-at-home mom or dad), talk to them. Make sure they’re on board with you going back to work. You will need their support. You will need them to look after the baby while you’re at work. You will need them to understand that you’re going to need some time to code/design/draw/create. At the same time, make sure they understand that you’re not disappearing. If the baby won’t stop screaming and they need a break, let them know it’s OK to interrupt you and ask you for help. But also make sure they’re OK with you shouldering them with more responsibility while you’re working. As the baby gets older, and you establish more of a routine, hopefully you’ll be able to spend more time working each day.
Having an amazing wife who understands all of this has made it much easier to get back to working. I’m still only working half-days, but without her support I wouldn’t be doing even that.
5) Working With the Baby
There are times when I need to look after the baby and do work. If (and this is a big if) the baby is in the right mood, sometimes he’ll let me put him into a baby carrier and he’ll happily sleep while I sit and do some coding. It doesn’t always work, and it’s not ideal, but it is a way to look after the baby and do some work at the same time.
6) Family Comes First
Yes, I’m talking about working with a baby in the home, but the final thing I wanted to say is to remember that your baby and your family come first. If your partner needs you, be there for them. If the baby needs you, look after him/her. Yes, we need to get work done, but work isn’t everything.
Conclusion
Working at home with a baby in the house is possible, but it is very challenging. The thing I keep reminding myself is that it’s an amazing opportunity most people don’t get. Most people don’t get to go back to work yet still see their child grow up before their eyes. We’re very lucky that we get to do this. Don’t take it for granted. Enjoy it.
What about you? As a mom or dad programmer/designer/artist/creator, what are your tips for working from home?
Owen
Indie Challenges
Sunday, November 14th, 2010
Several weeks ago I wrote up a post called “I’m Indie, and I’m Proud” about the things I love about being an indie game developer. The post was full of all the positive things I love about indie life. A few people pointed out that I wasn’t representing the whole picture, so I thought I’d write up a companion post about some of the biggest challenges I have encountered being indie. This is not meant to dissuade anyone from becoming indie, but merely to show both sides of the issue. Going indie is still one of the best decisions I’ve made.
Note: This article refers to being “indie” in the sense of running your own business. If you’re working a salaried position at a small indie studio, much of this won’t apply.
1. Lack of Stable Income
Let’s get this out of the way right off the bat, because it’s the biggie. As an indie developer, you will most likely not have a steady income. Your income will fluctuate greatly from day to day. Until you launch that first game, your income will be $0. Even after you launch that first game, your income may very well still be close to $0. You need to be ready for that.
Game Developer Magazine does an annual survey of game developer salaries around the world (but mostly centred in the US). This past year they did the first indie salary survey [1]. The survey found that the average annual income for a solo indie developer (i.e. a dev working by his or herself) is about $11,000 USD. The average increases to about $20,000 if the developer works as part of a team of two or more people. This is why so many indie developers do contract work on the side. Making your own game is a risk, but being paid to develop someone else’s game is less risky.
But there’s an upside: if you’re one of the few lucky ones to release a really killer game that takes off and becomes a hit, the potential to make a lot of money is there. Just don’t rely on it as your plan for sustaining the business.
What does this mean? It’s going to be an adjustment. If you’re used to working a job with a regular salary, working for yourself will take some time to get used to. You’ll start thinking about your time differently, and also start thinking about money differently. Instead of thinking “This DVD is only $20, I’ll take it!” You’ll start thinking “Wow, $20…that’s like selling 29 copies of my game at $0.99…that’s like…three days of sales.”
2. Work/Life Balance
In my other post I talked about the freedom we have as indie developers to work the hours we want to work. However, the flip side of that is that the line between home life and work life can easily become blurred. If you’re working for a larger indie studio you may have office space and this isn’t as much of a problem. But if you’re working from home, it’s easy to “just work one more hour” after dinner, or “just write a few more emails before bed”. Next thing you know it’s 2:00 AM and you’re introducing three bugs every 15 minutes into your rendering system. When your work computer is in your home, it can be difficult to force yourself to stop working, or sometimes to start working.
I’m a guy who likes his routine (boy is that changing now that I have a one-month-old baby). My routine helps me to work during “working hours” and not work when I want to spend time with my family. Even though I work from home, (before the baby) I got up every day at 7:30, showered, ate breakfast, got dressed, and “went to work”. It helps me to delineate the difference between being at home, and being at work. A friend of mine told me about his friend who used to walk around the block and return home to force himself to think about being “at work” differently. Where I still struggle the most is at the end of the day. 5:30 or 6:00 rolls around and I need to start cooking dinner, but it’s easy to “just write a couple more lines of code” and get lost in it.
However, it can be done. You can find a really nice balance between work and life outside of work. It’s just going to take more discipline than if you worked for someone else.
3. Oh So Much Paperwork
All you want to do is make great games, but if you’re reading this, you’re probably pretty serious about it. You’re running a business. Running a business comes with a lot of work that isn’t much fun: filling out international tax treaty forms, doing your monthly bookkeeping (did I say monthly? er…yearly?), filing your taxes, dealing with copyright or trademark infringement, figuring out how to make money, etc, etc. But it all needs to be done. Your brain will want to say to you “hey man, you could be logging your business receipts in your accounting software right now…but wouldn’t you much rather be implementing that new animation system you’ve been dying to try??” Sometimes you need to tell that little voice to shut up and take care of the business.
4. Feeling Like a Failure
Ok, this is starting to get kind of personal…and I really hope I’m not the only one who feels this sometimes. 😉 As much as you’ll have days where you absolutely LOVE being indie and making your own games, you will probably have days where it just sucks. You’ll get your daily sales report (if you’re selling on the App Store) and have a day where you made $1.43 the previous day and you’ll start to wonder what you’re doing with your life. You’ll hit a roadblock with your game and wonder if you’ll ever be able to solve it. You’ll get to an alpha build with your game and realize all the fun work is done and now you just have to hunker down and finish the boring parts of making a game. You’ll have a day where all your ideas feel like they’re the worst idea you’ve ever had.
I’m here to tell you: that’s ok. But this is why it’s so important that you LOVE making games. Because not all parts of the process are fun. Some parts suck. Some parts will make you want to quit. But if you really love it, if you can’t think of anything else you’d rather be doing with your life, then you’ll push through the bad days and you’ll get back to loving it again.
But…It’s Worth It
So yes, there are parts of being an indie developer that aren’t all sunshine, lollipops, and rainbows (you really should click that link). But you know what? I still love it! Because for all the annoyances and hard days, they all pale in comparison to the fact that I get to make the games I want to make every day!
Owen
[1] Brandon Sheffield and Jeffrey Fleming. “9th Annual Game Developer Salary Survey“. Game Developer Magazine. April 2010: 12.
Game Dev: Getting Started
Sunday, November 7th, 2010
A friend of mine sent me a message on Twitter the other day asking if I had any tips for someone looking to get started in game development. I mentioned this was quite a large question, so I asked him to narrow the scope of his question. He came back with “between idea and prototype.” That seemed like a good subject for a blog post!
So, you’ve got some programming under your belt. Maybe you’ve been building web site back ends, or accounting software, and you’d like to try your hand at games. Where do you start? If you’ve got an idea, how on earth do you approach the process of turning that idea into a prototype?
1. Consider Scope
I’m putting this right up front, because it’s the biggest and one of the most common traps a new developer can fall into: your idea is just too big. It’s very easy to bite off more than you can chew with a game idea. If you’ve never made a game before, don’t try to build a huge RPG in a massive world for your first game; you will almost certainly not finish it. What about something like tic-tac-toe instead? Or your favorite card game? Or a match-3 game (my first game, Dapple, was chosen because it had a very defined scope, and it still took nearly 6 months to make).
To put things into perspective: a triple-A Xbox 360 or PS3 game will have a team of 100-200 people working for 1-3 years on it. If you’re one person expecting to work on a game for six months, you need to make sure you’re working with an idea you can finish. You can’t build Halo by yourself. That’s ok. Pick a game idea you know you can finish; it will be challenging enough.
Also don’t forget that there are lots of parts to making a game that aren’t immediately obvious that you’ll need to build: menus, save systems, high score boards, platform specific requirements, etc, etc, etc. If you think your game is going to take you three months to make, bank on it taking six. So if you only have three months of savings to live off, maybe pick a game idea you think you can complete in a month and a half.
2. Learn About Games
This is a tough one, are you ready? You need to learn more about games. This means, yes, even playing other games for research. It’s a tough job, but someone’s got to do it. Take a look at other games in the genre that you’re targeting. Look at what they do well, and more importantly, what they don’t. What bugs you about the way they implemented things? What stands out as being done well? Are their menus clunky? Do the animations add that extra punch to really augment the gameplay? Does the music help draw you in? Take notes. Remember that you’re playing to learn, not just to have fun.
If you’re coming at this from a background other than game design, you may also need to do some reading. There are lots of great books written on the subject, and more being written every day, as the industry grows. See what expert game designers can teach you about designing games by reading their books.
One of my favourites, which is also a very quick read, is Raph Koster’s “A Theory of Fun for Game Design“. It’s great book to get you started thinking about designing games and what makes games fun. Another book I haven’t read yet, but have heard a lot of great things about, is Jesse Schell’s “The Art of Game Design: A Book of Lenses“. There are many other great ones, I’m sure. The important thing to remember is that making games is a constant learning experience, so get learning!
If you’re already a game developer reading this, what about you? What are you favourite books? What developer forums do you read? What blogs are the most useful?
3. Choose a Prototyping Technology
So you’ve got your idea and you’ve got some ideas about how to make it work as a game. Now you need to choose your technology for implementing a prototype. I gave a talk in April at the amazing 360iDev conference (their fall conference starts today in Austin) on rapid prototyping. One of the things I talked about is that when you’re prototyping, use whatever technology you are most comfortable with. This doesn’t have to be the same technology you’re going to implement the game with. If you’re targeting releasing an iOS game, but you’ve never touched Objective-C, but you’re a Flash wizard, prototype in Flash. If you’re an expert in javascript, prototype in javascript. If you’re not overly comfortable in any technology, prototype with pen and paper! Do whatever you need to do to get a working version of the game as quickly as possible. All the planning in the world won’t tell you whether or not the game is fun. Playing it will tell you that instantly.
If you’re doing iOS development, cocos2D is a fantastic platform with which to do 2D game prototyping. Flash is a great prototyping tool. If you’ve used Unity, I’m told it’s also great for prototyping. If you’ve got your own engine you’ve been building, use that, just be careful not to spend your prototyping time implementing engine features.
4. The 2-Minute Guide to Game Architecture
Ok, so what I’ve talked about is all well and good, but if you’ve never looked at game code before, you may be wondering how on earth a game works. This is obviously a HUGE topic, one that’s covered in immense detail in many books. However, I will attempt to give the extremely high level overview of how a game works. Ahem…wish me luck.
The Game Loop
At the heart of your game is a loop. This loop executes as long as the game is running. In fact, in many games, it’s a while (1) loop. In iOS development, you’ll be working with an event-driven timer instead. However it’s structured, the important thing is that you’ve got a chunk of code that’s going to execute over and over again. This chunk of code makes up one frame of execution. Most games aim for either 30 or 60 fps (frames per second). This means that your game loop needs to execute in less than 1/30 or 1/60 of a second.
At its most basic, your game loop is going to do two things every frame: update and then render.
The Update
This is where your per frame game logic resides. The update will do things like: pump the physics system (if there is one), update all the active animations, handle collision detection, etc. Basically, it updates the state of the game world in 1/30 or 1/60 second intervals. It says, 1/60 second has passed since the last time I was called, what needs to update? Oh, this character animation needs to be updated, these sprite positions needs to change, these two objects collided, etc. At the end of the update function, your game is in a new state and is ready for rendering.
The Render
Now that the world’s state has been updated, it’s time to render everything to the screen. This means going through all the renderable objects in the world and drawing them. If you’re using a graphics engine, then renderable objects (like sprites) may automatically get a draw() call made on them. If you’re using OpenGL or DirectX directly, then this is where you’ll be making calls into the graphics libraries to do the drawing yourself.
Building a rendering engine that runs quickly is an absolutely massive topic. You’ll need to pick up a book or two (and brush up on your 2D and 3D linear algebra, as well as low-level graphics hardware achitecture) if you’re going to roll your own.
Events
But let’s remember, games are interactive media. This means that at some point you need to handle user interaction with the game. This is often event-driven, in that it’s handled outside your main game loop. You’ll get calls into your code saying “this button was pressed” or “the user touched the screen here”. Some more traditional game loops would have input polling before the update was done. Many modern game frameworks (or platform APIs) rely much more heavily on event-driven code. Much more of your game logic will happen in your event handlers.
At any rate, these events are where you’re going to change game state based on what the user is doing. In a board game, the user might click a button to roll the dice, so your button click event handler is where you’ll trigger a dice roll. In a first-person shooter, you’ll be handling analog stick position updates to update the camera orientation and player’s position in the world.
You may also need to respond to system events, like an iPhone going to sleep, or the user alt-tabbing out of your full-screen game.
The Other Stuff
Those are the basics, but there is so much more that goes into a game: audio systems, user interface systems, front end menus, HUDs (heads up displays), physics systems, animation systems, game logic systems, font rendering systems, save game systems, leaderboard systems, achievement systems, and localization systems (to name but a few). But remember, not every game needs all of these things. That’s why it’s important to remember #1 and limit the scope of your first game.
The hardest thing about creating your first game is finishing it.
It will take dedication to work through the bugs and the tedious parts of building a game (yes, there are tedious parts), but in the end, it’s worth it. You’ll have a game that you made ready for the world to play and enjoy. So what are you waiting for? Start learning. Go make a game!
Owen
Your Time is Valuable
Sunday, October 31st, 2010
I’m back! If you’re a regular iDevBlogADay reader, you may have noticed that I was off the last two weeks. My wife and I had our first baby almost three weeks ago, and the other members of iDBAD were nice enough to let me have some “paternity leave” to get used to life with a new member of the family.
Now that I’m starting to learn to cope with very little sleep, and our new son is starting to find what might be described as the beginnings of a routine, I thought it was time to get back into the saddle and write up a post. Since I haven’t done any work in the last two weeks, a technical post seemed out of the question. And given that my life has been turned upside down, and I’m learning what it means to have no free time, I thought I’d talk about the value of our time as indie developers.
There seem to be three kinds of indie developers: those who treat games as a creative endeavour first and business second; those who treat games as a business first and a creative endeavour second; and those who think about both the art and the business carefully when building games. I’ll admit, I’m one who thinks about the creative aspect first and the business second, but I do think of this as a business. I’m not a hobbyist. I need to make money to be able to keep making games.
A year and half ago I wrote up a controversial blog post that talked about the relatively slow start that my first game, Dapple, got off to in a post called “The Numbers Post (aka Brutal Honesty)“. The post was meant to show another side to all the Instant Millionaire stories that were running about the App Store at the time. However, one thing that surprised me was that I received a lot of angry mail (some of it extremely angry) in response to the post. One of the things that people got most upset about was my calculation of the budget for the game.
In my breakdown I had called out my own time as part of the budget for the game. This upset a lot of people. But let’s consider this first. How many times have you been at a conference or an iPhone dev meetup and heard a conversation like this:
Dev 1: “So how much did your game cost to make?”
Dev 2: “Well, I paid $200 for sound effects from WebsiteX, but I did the art and programming myself, so that was free.”
I know I’ve heard that a lot. Hell, I think I’ve even said that at one point or another. What bothers is me is that so many of us have this attitude that our time isn’t worth anything. Why are the two months you spent programming and drawing “free”? It’s not. Your time is valuable. Your time is money.
Let’s think about it this way. If you had hired a programmer and an artist to build the game for you, how much would it have cost you? Would it have been free? If you had taken on a two month contract instead of building your own game, would you have done it for free? No. We are professional developers. Yes, we’re indie. Yes, we work for ourselves. But our time is not free. We need to start thinking about the cost of our time when we’re considering the cost of making a game.
Now, I’m not advocating avoiding a game you desperately want to make because you know it will lose money. What I’m trying to get at is that you should at least be aware that it’s going to lose money. If you still need to make the game, make it. We’re professionals. Our time is valuable. Let’s make informed decisions. Let’s take ourselves seriously.
Owen
P.S. Happy Halloween, everyone!