Archive for the ‘Art’ Category


Design Trek III: The Search for Inspiration

(No, this isn’t the 3rd in a series, that was a bad reference to Star Trek)

At the end of last week I wrapped up my work on a contract I’d been working on since last fall. My part of the project has been passed on to the next team of developers who will wrap up the final features. It feels great to be able to get back to work on my own projects, and I look forward to seeing the game launch when it’s done.

As I am returning to working on my own games, I thought a post about the time between projects would be in order. I often get asked by players where I find the inspiration for my games. I’m sure we all have different answers for this, but I thought I’d try to explain mine.

Where an idea comes from is difficult to answer. Inspiration comes in many forms for me, and I’m never quite sure where I’m going to find it. Sometimes it comes from playing another video game, sometimes a movie, sometimes discussing politics with friends.

One of the things that I think is most misunderstood about inspiration is the idea that you don’t need to work at it, that it will just come to you in a flash. I don’t believe this ever to be the case. Inspiration takes work, it takes dedication, and it takes patience. You need to work at being inspired. You need to work at your ideas. An artist might do dozens of sketches, then several small paintings working on an idea before finding the direction they want to take the final work. We too must actively look for ideas, experiment and refine them. That flash of inspiration only comes after you’ve done the research, the work, and given it all time to let your brain process the ideas.

Well that’s great, you say, but where do I begin? If it takes all this work, where does the work start? These are some of the activities I’ll do when I’m actively looking for inspiration:

  • read a book about a new subject
  • watch a film
  • go for a walk in nature
  • go for a walk in the city
  • play a video game
  • play a board game
  • go to a museum
  • go to an art gallery
  • write something
  • draw
  • build something with my hands
  • go out for a good meal
  • cook something new
  • go out with friends and/or family
  • walk to the river and listen the sounds of the water
  • start writing ideas down

You might have your own list that’s totally different. However, I believe that one of the most important items on that list is the last one: write down your ideas. The act of forcing yourself to think about a problem will lead to inspiration. It is not easy, it may even be actively difficult, but working through it will lead you in new directions and to new solutions. The more ideas you write down, the more ideas you will have. The less you work at actively thinking of new ideas, the fewer ideas you will have. This is why inspiration takes work.

But perhaps most importantly, you need to be constantly open to new ideas. You need to be aware of when an good idea is speaking to you, and know to follow it. That means resisting the urge to make assumptions and snap judgements about an idea. It means talking with people who disagree with you. It means debating without shutting out. It means empathy. Because finding a new idea often means looking at a problem from another point of view; understanding someone else’s feelings; putting yourself in someone else’s shoes.

As game designers, we need to be engaged in the world around us. Games are about interactivity, emotion, and narrative. The world is full of all these things, we just have look for it, and work at it seeing it.

Owen


Universal OpenGL Apps

I recently took part in the 360iDev Game Jam remotely from home. The game jam is always a lot of fun, even if you can’t get yourself to the 360iDev conference itself (which you should totally do, by the way, if you can. It’s an amazing conference). I created a game in 8 hours which I’m calling “Dirty Diapers”, you can see the details of its creation on the Game Jam site. There’s a video of the game in action at the end of that page.

The game is about keeping a room full of babies happy. Over time, babies become unhappy because they either want to be fed, changed, or rocked. It’s your job to drag an action up from the bottom of the screen to make the baby happy again. As time goes on, they get more unhappy more frequently.

I think it turned out quite well, so I’ve decided to try to get it into the store at some point. Right now I’m extremely busy with some contract work, but I’m trying to find a few hours here and there to finish it up and submit it.

One of things I decided to try with this game was to build it as a universal app (that is, one app that runs on iPhone/iPod touch, and iPad, instead of separate apps for iPhone and iPad). The game is 100% OpenGL on the rendering side, so I needed to figure out how to set up my frame buffers for a universal app. I thought I’d go through that today. (Holy moly, a technical post instead of an indie lifestyle post! Hold on to your hats!)

Project Setup

The first thing you need to do for a universal app is set up your Xcode project so that it knows to build the app as universal. I went to Jeff LaMarche’s excellent blog and followed his instructions to do this part (and read the follow-up post for a few more details).

Once you’ve done that, you should have a project that can at least compile for iPad or iPhone. Good.

Frame Buffer Setup

Now that you’ve got your app building for multiple devices, you’re going to need to do some work to support multiple screen resolutions. As of this writing, there are three different resolutions to worry about:

  • iPad: 1024 x 768
  • iPhone/iPod touch (non-retina display): 320 x 480
  • iPhone/iPod touch (retina display): 640 x 960

However, Apple does some clever stuff to help you with the retina displays. If you query the size of the screen:

CGRect screenFrame = [[UIScreen mainScreen] applicationFrame];

You’ll get 320 x 480 on both retina and non-retina displays. This is because they measure the screen in “points” instead of pixels now. On a retina display, there are 2 pixels for every point. The nice thing is that it lets you treat all iPhone/iPod touch screens the same way, with the same positioning code.

Ok, so we’ve got these different screen sizes, we need to tell OpenGL to create different sized frame buffers. Somewhere in your code you’ve probably got something like this, which creates a render buffer from an EAGLDrawable CAEAGLLayer:

glBindRenderbufferOES(GL_RENDERBUFFER_OES, buffer.m_colorBufferHandle);
[oglContext renderbufferStorage:GL_RENDERBUFFER_OES fromDrawable:drawable];
glGetRenderbufferParameterivOES(GL_RENDERBUFFER_OES, GL_RENDERBUFFER_WIDTH_OES, &buffer.m_width);
glGetRenderbufferParameterivOES(GL_RENDERBUFFER_OES, GL_RENDERBUFFER_HEIGHT_OES, &buffer.m_height);

If you build and run, what you’ll find is that your render buffer will be created with the proper size for iPad and non-retina displays, but you’ll end up with a 320 x 480 render buffer for retina displays (which need 640 x 960), and your retina display game will look awful. This is because the CAEAGLLayer is telling OpenGL that it’s dimensions are 320 x 480 on the retina display.

In order to remedy this, we need to make use of two new UIView properties found in iOS 4.0 and up called: scale and contentScaleFactor.

scale

The new scale property will tell you the amount the point values of the UIView are being scaled. If you’re running on a non-retina display and query a view’s scale, it will be 1.0. If you’re running on an retina display, you’ll find that it’s 2.0. This gives you a way to test which kind of display we’re working with, and we’ll use this later.

contentScaleFactor

The contentScaleFactor is a different beast. This will always be 1.0. However, if you’re running OpenGL in a view on a retina display, you need to set this value to match the scale value of the view. This will tell the CAEAGLLayer to update its dimensions to match the actual pixel size of the screen, allowing you to create an appropriately sized render buffer.

Now, if you’re planning to support iOS versions prior to 4.0, these properties won’t be available, so you need to do runtime checks for them.

This is what I do inside my EAGLView’s -layoutSubviews method to set the contentScaleFactor on the view:

// Set the scale factor to be the same as the main screen
if ([self respondsToSelector: NSSelectorFromString(@"contentScaleFactor")]) {
    [self setContentScaleFactor:[[UIScreen mainScreen] scale]];
}

Now, when I tell the render buffer to create itself based on the size of the layer, it will create a 640 x 960 render buffer on a retina display, but a 320 x 480 buffer on a non-retina display. Hooray! But, we’re not quite there yet…

Viewport Setup

We’ve got our render buffer set up to create itself at the proper resolution now. It will match the screen dimension and contentScaleFactor of the EAGLView, which is what we want. Now we need to tell OpenGL to create an appropriately sized viewport. This code is for a 2D game, so adjust as necessary for a 3D game.

You’ll need to create a viewport that matches the frame buffer size for the given screen. Something like this:

glViewport(0, 0, buffer.m_width, buffer.m_height);

For a 2D game, you then need to set up an orthogonal projection. There’s a good chance that you have a line in your code somewhere that looks like this:

glOrthof(0.0f, 480.f, 320.f, 0.0f, -1.0f, 1.0f);

Clearly this isn’t going to work. Now, there are two options here for creating the transform:

1) Create the transform based on the UIScreen size

The code for this is simple:

CGRect appFrame = [[UIScreen mainScreen] applicationFrame];
glOrthof(0.0f, appFrame.size.width, appFrame.size.height, 0.0f, -1.0f, 1.0f);

However, let’s look at what this does. On iPad, it creates a 1024 x 768 sized viewport. Great, that’s what we want. On a non-retina display, it creates a 320 x 480 viewport. Also good. But, on a retina display, it also creates a 320 x 480 display. Now, this is OK. The framebuffer is 640 x 960, so the pixels are there. So what does this mean?

The Good

You only need to write two code paths for positioning sprites on the screen: one for iPad, and one for iPhone, and let OpenGL handle matching the render buffer to the viewport appropriately for you. The only caveat here is that you’ll need to manually scale all your sprites’ sizes by 50%. If you do this, you’ll scale them down to the correct point size, and then OpenGL will render them at 100% resolution when it pushes the textures through the render pipeline.

Confused? Think about it this way: you’ve got a view port of 320 x 480 but a render buffer of 640 x 960. Take a sprite that’s 100 pixels x 100 pixels and render it as a 100 x 100 point sprite in the viewport. This is actually 200 x 200 pixels in the render buffer. So in order to render it as 100 x 100 pixels, you need to scale your vertices down by 50% to a 50 x 50 point sprite.

The Bad

You’ll need to write some code into your sprite system (and bitmap font system) to scale things to 50% if you’re on a retina display.

This is the approach I use. At app startup, I get the screen scaling factor, and then use it to scale all my sprites:

if ([[UIScreen mainScreen] respondsToSelector: NSSelectorFromString(@"scale")]) {
    ScreenScaleFactor = [[UIScreen mainScreen] scale];
    InverseScaleFactor = 1.f / ScreenScaleFactor;
}
2) Create the transform based on the layer size

The alternative is to create a different viewport size based on the actual pixel size of the screen. You can do this by getting the size of your created render buffer. Something like this:

glOrthof(0.0f, frameBuffer.m_width, frameBuffer.m_height, 0.0f, -1.0f, 1.0f);

This will give you a viewport that matches the screen size in pixels, not points.

The Good

The advantage here is that you don’t need to do any sprite scaling. You just render everything at 100%.

The Bad

You’ll need to have three different code paths for sprite positioning, based on the size of the screen, as you’ll now have three different sized viewports to worry about.

Art Work

You’ll probably want to have different sized artwork for non-retina displays than for iPad and retina displays. For Dirty Diapers I’ve got two game texture atlases: one for iPad and retina displays, and one for non-retina displays. The non-retina atlas is identical to the larger one, it’s just scaled down 50% in Photoshop. You could scale your graphics in OpenGL, but it will never look as good. If you’re like me, the imperfections will just drive you nuts.

So I have two texture atlases, but there are 3 possible screen sizes to worry about (see the next section). I do a check like this to determine which texture atlas to load:

if (UI_USER_INTERFACE_IDIOM() == UIUserInterfaceIdiomPad ||
    ScreenSizeConsts::ScreenScaleFactor > 1.01f)
{
    // Load texture atlas for iPad/Retina display
}
else
{
    // Load texture atlas for Original iPhone display
}

If you want to load 3 different textures (iPad, non-retina, retina), you can use the @2x.png file naming convention (depending on how you’re loading your textures) and just check for iPad or not, but now you’re dealing with 3 sets of textures. The choice is yours. If you’re loading textures manually and the @2x trick doesn’t work, you can split things out like this:

if (UI_USER_INTERFACE_IDIOM() == UIUserInterfaceIdiomPad)
{
    // Load texture atlas for iPad display
}
else if (ScreenSizeConsts::ScreenScaleFactor > 1.01f)
{
    // Load texture atlas for Retina display
}
else
{
    // Load texture atlas for Original iPhone display
}

Finally, Positioning

Now you’ve got your different artwork loading, you’ve got your render buffer set up, and your viewport set up. Now you just need to tell your objects to render in different positions, based on the screen. To do this, I set up a bunch of member variables for positioning code (for static items), and then on init, check the device and screen scale factors and adjust them accordingly. This is necessary for 2D art layout, but if you’re working with a viewport into a 3D world, you may not need to do nearly as much work here.

That’s it…

There you go. I hope you were able to follow along and I wasn’t too confusing. If you’ve got better ways of doing any of this, feel free to post suggestions in the comments.

Owen


LandFormer Postmortem

A couple of months after I launch a game, I like to sit down and take a hard and honest look at the things that went right and the things that went wrong: a postmortem. It’s a great exercise to go through after a game is launched to learn from your successes and, more importantly, your mistakes. I wrote up a postmortem after launching Monkeys in Space that was based on the structure that Game Developer Magazine uses. I’m going to use that same format for this LandFormer postmortem.

Introduction

If you haven’t played the game, LandFormer is a puzzle game for iPhone/iPod touch. Each level is made up of a 5×5 grid of terrain at different heights (oceans, up to mountains). The goal on each level is to use land forming tools to modify the heights of the terrain tiles to flatten things out. It’s a challenging game that starts off very easy, but get quite difficult in the harder levels. It’s a game that requires skill, patience, but most of all, intuition.

The game is free to download and try (there are 12 levels currently in the free version of the game), with In-App Purchase (IAP) available to upgrade to the “full” version of the game, as well as IAP for additional visual themes and additional levels. I think of it like a demo, where the user gets to try it and then decide if they want to spend money on more levels. The free version also contains ads, which are disabled if the player buys any content from the in-game shop.

The game launched on June 29, 2010 and has had 147,000 downloads of the free version of the game so far.

What Went Right?

1) Gameplay

I’m really happy with how the game itself turned out. LandFormer started as a prototype called “UpDown” that I did in 6 hours at the all-night GameJam for 360iDev Denver in September, 2009 (I participated via Skype). After I launched Monkeys in Space, I returned to the prototype in early 2010 and started playing around with ways to make it more fun, and settled on the terraforming theme, which helps players understand what they’re supposed to do, and why.

What I like most about the game is that I haven’t really seen other puzzle games like it. It’s similar in play-style to sliding block puzzle games (it requires a similar combination of spatial reasoning and intuition), but the up/down movement of the pieces makes it feel very new and requires new ways of thinking. It’s also very easy to learn how to play, but takes time to really master it and get good at the more difficult puzzles. In the end, I think the gameplay stands as being strong, and I’m very pleased with how the game turned out.

2) Strong Launch

This is my 3rd game, and thus my 3rd game launch. However, with LandFormer I decided it was time to try a new launch strategy. With my previous games, I launched the games as soon as Apple approved them. This caused all sorts of problems in terms of getting press materials out, and reviews trickling out gradually. With LandFormer, I decided to set a proper release date. When Apple approved the game, I set the release date for a week and a half into the future. I immediately sent out press releases to sites along with promo codes (yes, they work once the game has been approved, but before it’s available in the store) for press to try the game. Because my content is all IAP on my server, I could also make it available to the press for free during the pre-launch review period. Very handy.

The result of this new launch strategy was that several large review sites had reviews out within one or two days of launch. This helped pick up momentum for the game, then the first Thursday after launch Apple featured it as a Hot New Game. The Friday immediately after the feature, Gizmodo ran a review of the game, which boosted downloads tremendously for the following weekend.

I really couldn’t have asked for much better a launch. The only way it could have been better was by getting a front-page feature, or App of the Week feature from Apple. They’re probably just saving that for my next game (har har).

3) Free + IAP

As all developers do, I struggled a lot with the pricing model for the game. My other games are both paid games, but Dapple has a separate Lite version for players to “try before they buy”. The thing I don’t like about the Lite model is that it requires players to download two separate apps if they then want to buy the game. It always felt kludgy to me. Ultimately I decided to set things up like a PC or XBLA demo: free to download it, but if you like it, buy the full upgrade from within the game. This is the really exciting monetization path that IAP opened up when Apple introduced it.

Because I was implementing the in-game store for this anyway, it also allowed me to developing a theming system for the game and sell themes. It also means I can continue to release new level packs for users without having to update the game itself.

I think the model has a lot of potential on the app store. The free download gets you maximum visibility on the store (people are willing to download something just because it’s free), but then you have a way to earn some money within the app. However, it’s not all rainbows and unicorns: see the corresponding section in What Went Wrong.

4) Level Editor

When I started building the game, I was building levels as string of data then loading them into the game and testing them. This was ridiculous. I realized early on that building a level could be seen as solving a level in reverse. I was able to very quickly build a first pass at a level editor just by reversing the rules: start with a flat plane, and use the tools to deform it. This had two advantages: 1) it made building levels much easier, and 2) it meant that any level created in the level editor was guaranteed to have a solution.

Once I had it working for my own purposes I decided that it needed to be available to players in the game. The level editor is so easy and intuitive to use, I need people to be able to play with it. I’m happy I took the time to do the UI work required to build the level editor out into something that everyone could use.

The editor allows players to create their own levels, but beyond that, I implemented a sharing system based on URLs, where players could email a level to a friend. The friend clicks a link in the email and the level opens inside their copy of the game for them to play. It’s a simple system, that I think works quite nicely.

5) Doing Everything (Almost)

Since Monkeys in Space, I’ve been doing everything except the music in my games by myself. For both Monkeys and LandFormer I did all of the game design, programmer, artwork, UI design, sound design, PR, and marketing. I don’t do music, because that’s just something I’m not capable of doing myself. However, doing everything myself has given me a lot of freedom to make the game exactly how I want to make it. It also allows me to think about how a change will impact all the various aspects of the game. And, perhaps most importantly, it allows me to save a huge amount of out-of-pocket expense. I would love to have the funds to pay a full-time artist to work on the game, but that’s just not in the cards for me yet. I do have some art background, but doing all my own art for these games has helped me get a lot better than I was. I hope I’ll continue to improve. However, this is also another one of those things that also appears on the What Went Wrong section. So let’s get to that now.

What Went Wrong?

1) Free + IAP

I listed the reasons why I thought Free + IAP was great for LandFormer, but it’s also something that didn’t work great. One thing I was not at all prepared for was a backlash from users over the pricing model. I thought that players would be happy that they were given an opportunity to try the game before spending any money on it. However, the reaction from a lot of players instead was “The game says it’s free, but you have to buy stuff!” I got called a cheat, a liar, and a con artist.

My immediate reaction was that my app description clearly states that you only get the Beginner levels for free and have to buy the others. The app page in the store also lists the top IAP. But what I learned is that no one reads that stuff. I think I got a lot of downloads (especially after some of the big press stories ran) from people who saw the name, the icon, and “free” and downloaded it.

The problem is that there’s a disconnect between my view of the pricing model, and that of the minority of angry, vocal, app store consumers. I saw: “LandFormer offers you a way to try the game for free, and if you like it, buy it.” That customer sees: “Hey, a free game!” And then is angry when they discover they can’t play all the levels for free.

In the end, I’m not sure if the pricing model I chose for LandFormer was the right call or not. I’m not convinced that I wouldn’t have made more money by distributing a Lite version and a separate paid version (or only a paid version). App Store customers have gotten used to that model. I think it’s a problem with the fact that IAP didn’t exist from the start. Users had a year to get used to a certain business model, now we’re trying to change that. It’s going to be a difficult transition.

Not to go on about this for too long, but I think the Free + IAP model works best for games where you’re giving away a complete game for free, and then selling IAP for additional content that’s not required. If I ever do another free game, I’ll be looking toward that model.

2) iOS 4 + Multitasking

Apple launched iOS 4 on June 21, 2010, 8 days before I launched LandFormer, but 2 days after Apple had approved it. I had time with the beta SDK to make sure the game didn’t crash and that the game could be put into the background and restored properly before shipping it. However, I spent a great deal of time over the next 3 updates fixing weird little issues that cropped up because of iOS 4 multitasking. Multitasking caused all kinds of problems with my level sharing system, as well as my save system. I believe there was also one crash that only showed up in iOS 4 because of a change in the way some touch events fired. I’m not blaming Apple, it was just bad luck on my part that I launched so close to iOS 4, and I couldn’t afford to delay the launch of the game any more to deal with all the little issues that cropped up.

3) Ad Network

I mentioned in the introduction that I decided to include ads in the free version of the game. This is in this section for several reasons. At the peak of LandFormer’s popularity, it was being downloaded about 12,000 times per day. This translated into about 50,000 ad impressions a day. However, my click-through rate (CTR) was abysmal. It turned out that the way I was loading ads meant that a lot of people never saw the ads I requested. On my best day, I made about $5 off of ads. In the first update to the game (v1.1) I released a fix that made sure that ads were displayed properly to users. However, by the time it was approved I was down to a few hundred downloads a day of the free game. Even though my CTR increased dramatically with the change, my earnings averaged out around $0.30-0.40/day.

On top of that, the ad network I used had a crash bug in its code. After a couple of weeks trying to help them track the problem down, they told me they weren’t going to look into it any further. I was getting several support requests a week from players about this crash, so ultimately I pulled their ad network out of my game and I wrote my own custom system.

The game now (in v1.1.2) pulls ads of my own server. This is cool for several reasons. Now I get to decide what ads get shown in the game, it means I can cross promote my other games, and it means that I can promote games that I actually buy and play. I use LinkShare to get a small royalty any time someone actually buys through this system, but that’s been next to nothing so far. Still, I’d rather help support developers whose work I respect and have no crashes, than get the $0.30/day but with 10% of users experiencing a crash every time they launch the game.

4) Themes

When I built the IAP system I was very excited to be able to sell themes (skins) for the game. The way I had set up the graphics engine meant that it would be easy for me to load different textures to change the look of the game. I thought players would like the chance to be able to customize their experience a bit more too, but I was wrong. I’m seeing about a 0.1% conversion rate on themes (i.e. about 1 in 1000 people download a theme).

At this point, I only have one theme for sale. So it could be that people just don’t like that theme. It could also be that people just like the default art more. Or it could just be that people really don’t care about theming this kind of game. Though, if you think about it another way, if 1 in 100 people buy the premium content, the users who would buy a theme are probably a subset of that 1 in 100. So that means about 1 in 10 of those people have bought the theme, so maybe that’s ok. Still, when you do the math, that’s about $100 made off the theme so far, and it took almost a week of art work to build it (not even counting the time it took to put the theming system in place). When you look at it like that, it’s not as worth it.

I’m currently working on another theme. If it doesn’t sell, I probably won’t be releasing more themes. I think themes would sell better in a game where you could play the whole game for free. I think people might be willing to buy a theme in that case.

5) Doing Everything (Almost)

I’ve already outlined why I thought this worked for the project, but doing everything by oneself also comes with some big downsides. The biggest is time. LandFormer took 5 months from start to launch (then another month of work after launch). I’d guess that at least 2 months of that was doing the artwork and UI design for the game. If I could have afforded to pay a professional artist to do that for me, they probably would have taken half the time, and they could have been doing it while I programmed.

The other big downside is not having someone to bounce ideas off of. Working with an artist allows you to brainstorm, to try new things, and play with the concepts in the artistic direction of the game. When you’re doing it all yourself, it’s easy to get caught in the trap of just doing the first thing that comes to mind. It’s hard to force yourself to try multiple things and to find the best artistic solution to a problem.

Conclusion

In the end, I’m extremely pleased with the way that LandFormer turned out. I think it’s my strongest game to date. The game was also an opportunity for me to experiment with several new things I’d never tried before: IAP, free games, ad-supported games, and user-created content and sharing. I’m very happy with the number of free downloads the game has had. I find it absolutely amazing to think that almost 150,000 people have downloaded my game! At the same time, I’d be lying if I said I was happy with the conversion rate I’ve seen from free to paid.

The game continues to get a couple hundred downloads a day, and it seems to have stabilized there. I hope that it will maintain this level (or higher) for quite some time. The fact that it’s free seems to help keep the downloads alive.

Every game is an incredible learning experience, and I’ve learned a lot in making and launching LandFormer. I’ll be continuing to support it and add new content, but I’m also looking ahead to what’s next. Onward!

Owen


Sneak Peek: City Theme Sketch

I thought a few people might like to see how the design of a new theme for LandFormer starts. I’ve started working on the concepts for a city theme for the game. I did some sketching the other night and these are the drawings I’ll be basing the theme on:

City Theme Sketch

You can see there are the 5 tile heights from the game. I’ll be working from these drawing to start creating the main tiles for the theme. There’s a lot of other art that goes into a theme, but the tiles are what I start with.

Owen


Theme Sneak Peek

LandFormer is coming along nicely. I’m getting really close to submitting; hopefully within the next week, if all goes according to plan.

One of the things I’ve been working on the for the last couple of days is a new theme for the game. You’ve seen the Earth theme already:

LandFormer Earth Theme

LandFormer Earth Theme

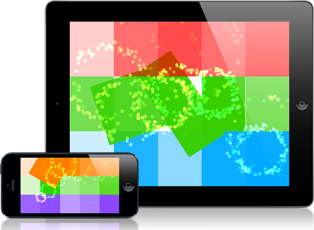
This is the new Colorful Blocks theme I’ve been working on:

Colorful Blocks Theme

Colorful Blocks Theme

This new theme will be available for purchase inside the game when it launches.

Now, I must get back to work!

Owen